Skinny Scones

Scones aren’t exactly a health-food, but made this way, they aren’t half bad! These scones are low-fat, very lightly sweetened, and half whole wheat. Plus, they’ve got delicious blueberries, which are packed with antioxidants, as I’m sure everyone is aware of now :P. You can substitute other berries for the blueberries, or apple chunks, or even chocolate chips as the original recipe from Skinny Taste calls for, but blueberries just seem right in this recipe to me!

Image

Ingredients:

  • 3/4 cup cold buttermilk
  • 1/4 cup sugar
  • 2 tsp vanilla extract
  • 1 large egg
  • 1 cup all purpose flour
  • 1 cup white whole wheat flour
  • 1 tbsp baking powder
  • 1/2 tsp salt
  • 3 tbsp chilled butter (must be cold) cut into small pieces
  • 3/4 cup blueberries (preferably fresh, but I used frozen and they worked fine)
  • cooking spray (or cornmeal)
  • a couple tbsp milk (optional)
  • a couple tbsp sugar (optional)

Begin by preheating your oven to 375 F, and either spraying a baking sheet with cooking spray, or dusting it with cornmeal, which is what I opted for. I also used my baking tile.

Whisk the buttermilk, sugar, vanilla, and egg together in a medium bowl, and set aside. Whisk together both types of flour, baking powder and salt, then cut in the butter until the resembles fine crumbs. Gently fold in the blueberries, then stir in the milk mixture, just until combined.

Turn the dough out onto a well floured surface, and knead the dough a few times, being careful not to over work it. Form the dough into a 9 inch circle on the baking sheet, and then cut the dough into eight wedges (or twelve, if you want to be responsible :P). You can brush them with milk to promote browning if you would like, as well as sprinkle them with sugar.

Place the baking sheet in the oven, and bake for 20-25 minutes. When a wooden skewer comes out of the centre of one of the scones clean, they’re done.

Image

-Happy Cooking!

Braided Bread

ImageImage

This is traditionally made on Easter, and I totally realize that it’s way too late for you guys to make it, but I made some, and it’s so good I have no idea why anyone would possibly only make this once a year.

It’s a long process to make this, but you’re not doing anything for most of it, so it’s not a problem!

I got this recipe from Food Wishes, and really loved how it turned out. I changed the ingredients up a tiny bit, but only to change the flavouring, so the bread is practically the same. If you want to see how it’s done, go and check out the site! I love cooking from video tutorials, because you can see exactly what your recipe is supposed to look like every step of the way. I’m considering doing them myself, but that might be a long time coming.

Ingredients:

Bread:

  • 1 (.25 oz) packet of dry active yeast (2 1/4 tsp)
  • 1/4 cup warm water (100 degrees F.)
  • 3/4 cup sugar
  • 4 eggs
  • 2 tbsp anise seeds
  • 1 tbsp lemon zest
  • 1 1/4 tsp salt
  • 2 tbsp vegetable oil
  • 6 tbsp melted butter
  • 1/4 cup milk
  • 4 1/2 cups all-purpose flour, plus more as needed

Icing:

  • 1 cup confectioners sugar
  • 2 tbsp milk
  • 1 tbsp fresh lemon juice
  • a drop of your food colouring, go for whatever colour you want, or a mix of colours!

This bread is super flavourful and really fun to make and look at! You can cover the whole thing in icing, or you can drizzle it like I did, or you can be grown ups and not put any icing on at all (who wants to be grown ups though, seriously?)

Dissolve yeast and 1/2 teaspoon sugar in warm water in a large bowl. Let stand until the yeast softens and begins to form a creamy foam, about 10 minutes. Meanwhile, whisk 3/4 cup sugar, eggs, oil, lemon zest, anise seeds, lemon extract, and salt, together in a bowl.

Pour egg mixture, melted butter, and milk into yeast mixture once proofed, and stir to combine. Add 4 cups flour, 1 cup at time, stirring after each addition. When the dough is ready (it will be quite sticky), turn it out onto a floured surface and knead until smooth and elastic, adding remaining 1/2 cup flour (or more, I did) as necessary, 5 to 6 minutes.

Coat a large bowl with oil. Place dough in bowl and turn to coat. Place a damp cloth over the bowl, place bowl in the oven with the oven light on, and let rise until doubled in size, 12 hours or overnight.

Line 2 baking sheets with silicone baking mats or parchment paper, and set them aside.

Punch the dough down and divide into four equal portions. Divide each portion into three ropes. Braid each set of three dough ropes to form four small braided loaves. If you know you’re awful at braiding, you could probably just make them into two stranded twists. Transfer loaves to prepared baking sheets, 2 per sheet, and let rise until doubled in size, about 2 hours. The recipe didn’t say to do it, but I covered mine with a damp towel so they wouldn’t dry out, or you could probably cover them with cling film, dusting them with flower first so it doesn’t stick (drape it over, don’t tightly cover them).

Preheat oven to 350 degrees F (175 degrees C).

Bake bread in the preheated oven until the tops are golden and the bottom of the loaves sound hollow when tapped, 20 to 25 minutes. It’s not completely necessary, but I brushed mine with milk to promote nicer browning.

If icing them, you need to let them cool completely before icing them, as with anything.

The icing is super easy, and sets up hard. Just mix everything together, and you’re golden!

Image


-Happy Cooking!

Fromage Blanc

Fromage what? Blanc who? The non-fancy-French way to say this is White Cheese, or Farmer’s Cheese. I made some. I made cheese. 

Yes, you’re just as confused as I am. 

To be honest, it was a giant pain in the butt, and I doubt I’ll ever make it again, or at least for a very long time, but apparently it was worth it in the end, because my parents both say it tastes like, and has the texture of, goat cheese! For someone in a place where goat cheese is easily obtained, that might not be that impressive, but for as much cheese as I made, the equivalent in goat cheese here would probably be about 20 dollars. And I can now say I’ve made, and know how to make, cheese.

I am in no way going to show you guys how I made this, because it barely worked at all and I wouldn’t do that to you, but I’ll show you where I learned how to make it, over on Food Wishes video recipes, which is hosted by one of my favourite food bloggers. If you try it, let me know how it turns out. I wish you better luck than I had!

I still kinda feel fancy-dancy and proud that I made cheese… 😀

Image

Image

By the way, the above picture is what I made for Easter breakfast for my parents. Eggs in clouds, with my home made cheese on my whole wheat bread.

-Happy Cooking!


Irish Soda Bread

This is a recipe for Irish Soda bread which I found on the blog Skinny Taste quite a long time ago, and didn’t have the chance to try until now. I adapted it, using all white flour instead of half white, half whole wheat, and halving the sugar, omitted the raisins and I added anise seeds! I bought them for making easter bread tomorrow, and they smelled so good that I couldn’t resist. I thought they would be prefect in this slightly sweet, breakfasty type bread. I even sprinkled them in my corn flakes and berries this morning!

Ingredients:

  • 3 cups all purpose flour
  • 1 1/2 tsp baking soda
  • 1 tsp salt
  • 2 tbsp sugar
  • 4 tsp anise seeds (When I make this again, I’ll go up to 2 tbsp, for more anise flavour)
  • 1 1/2 cups reduced fat buttermilk

This recipe is super easy. Preheat your oven to 375 F

In a large bowl, whisk everything but the buttermilk together.

Image

Add the buttermilk a little at a time, until it pulls together into a soft, very sticky dough.

Image

Flip the dough onto a lightly floured surface and kneed it for about a minute, then you can form it into a round, slightly flattened loaf, or you can do as I did and half it, and form it into two smaller round loaves. I did that, because I want to keep one, and bring one to some friends as a little Easter gift this afternoon. Place them (or it) onto a baking sheet with a baking mat or parchment paper on it, or you can do as I did and use a baking tile, preheated in the oven and dusted with flour.Image

For two small loaves, bake for about 30 minutes, (for one larger one, bake for 40 minutes) or until golden, and test to see if they’re (or it’s) done by inserting a tooth pick into one. If it comes out clean, you’re good to go! I saw a recipe for Irish Soda bread where and egg wash was brushed over it a few times as it cooked, but it get’s a lovely golden colour without one. Image

Let it cool for 5-10 minutes on a wire rack, then enjoy plain, or with butter or jam.

Image

This was hard for me to not eat a ridiculous amount of, an I’m not a huge bread fan! Moist inside, crusty, and very flavourful. Sevral thumbs up!

-Happy Cooking!

Healthy Brownies

No. I am 100% not kidding at all. These are good for you. Honestly. Yes, I know, I was excited too!

I got them off of the lovely blog Skinny Taste, which just so happens to be the first food blog I ever read, or subscribed to! It’s wonderful. With healthy things. Go check it out! I owe my discovery of this recipe to that blog.

I wasn’t too sceptical when I saw that these brownies called for black beans, because I am a firm believer that food is magical, and you can do insane things with it. My mum, however, was a bit sceptical, and my dad got a rather comical look on his face when I told him of my plans to make them. I didn’t even tell my sister anything more than, “DUDE, I made brownies!” because I wanted her to actually eat them. She’s out at the mo and I couldn’t resist putting this up immediately, so I’ve not got her feed back yet, but I have mine, and holy mother of food, these things are good. They totally and completely do NOT taste healthy. They taste like really good brownies. 

Please don’t judge me for immediately eating two.

Image


I can’t keep y’all waiting. Here’s the ridiculously easy recipe!

Ingredients:

  • 1 (14 oz) can black beans, rinsed and drained
  • 2 large eggs
  • 1/2 cup cocoa powder
  • 3/4 cup sugar
  • 1/2 teaspoon oil
  • 1 tablespoon unsweetened almond milk (or dairy, skim)
  • 1 teaspoon balsamic vinegar
  • 1/2 teaspoon baking powder
  • 1/2 teaspoon baking soda
  • 1/2 teaspoon of freshly ground coffee or instant coffee
  • 1 cup semisweet chocolate chips, divided

Preheat the oven to 350 F, and spray a  9 x 9-inch square baking pan with baking spray. I didn’t have one, so I used a weird oval kind of casserole dish. 

Blend everything except the chocolate chips in a blender or food processor.

Image

See? Beans!

Transfer to a bowl, and then fold in half of the chocolate chips. Then pour the batter into your sprayed pan. Sprinkle the other half of the choco chips on top of the batter. I was stunned with how smooth this turned out, and how delicious the batter was. I totally did not lick the spatula and bowl. Nope. Didn’t happen.

Image


Bake them for 30 minutes, or until a toothpick inserted into the centre comes out clean. It took me nearly 40 minutes, because my dish was a little smaller, therefore deeper, andthicker, and because my oven is… challenged. Let’s go with challenged.

Look how beautifully they turned out!

Image


Please, for your sake, let them cool completely before you cut into them. I would even go so far as to chill them in the fridge for an hour or two. I was too impatient, and cut in and got scraggly lines. I didn’t care, they were ridiculously good.

Image

See the scraggly lines? My impatience will be the death of me one day. Especially with desserts. *sigh*

I can’t wait to give these to my sister. I am going to watch her enjoy one with gusto, and then tell her that they contain black beans. She will eat chickpeas, she will eat navy beans, but she will not eat black beans. Hey, don’t feel bad for her, she told me to disguise veggies in things, because she won’t eat them otherwise. The way I see it, this is an extension of that! I’m a good little sister, really.

Try these! You’ll be glad you did.

-Happy Cooking!

Spinach Berry Smoothie (And Some Pictures to Make You Jealous)

Look where my run took me today! How ridiculously lucky am I to have grown up enjoying island life, and am now enjoying it again?

This post has a lot of chatting, as with all my others. Skip to the end if you just want the recipe! I won’t feel bad.

Image


Now, I’ll be the first to admit, very freely, that I am not in very good shape at all. The heaviest thing I can lift is probably a pot of soup. I’m not kidding. ButI’ve been working out everyday since I got home, and I plan to remedy that. I usually rely on walking and yoga for exercise, because I’m in such bad shape that anything else is completely awful (like running :(), but I really just need to run sometimes. Cardio is just necessary.

I felt that hardcore today, after making another batch of éclairs. Yes, my dad ate seven between yesterday afternoon and 10 am this morning. Don’t judge, we have fast metabolisms in this family (and he forgets to eat during the day most of the time, so some decadence is okay).

Now, I felt the need to run because of two reasons: 

  1. I was tasting as I went along with these éclairs to make sure they turned out right, and I got a seriously unhealthy amount of sugar in me from making sweet vanilla whipped cream.
  2. When I get frazzled (which often happens in the kitchen when other people are hanging over me, or something isn’t working), I get adrenaline rushes.

These two things combined gave me a serious case of shaky hands and pent up energy. When I feel that, I go for runs! Even if they’re short, they help. That’s how I ended up at this lovely place which my family and I call Fishy Pools (because there are little tide pools), but the rest of the sane world calls L’anse Aux Epines Point. It’s so beautiful there, and if you go prepared with towels and a swim suit on a rough day, you can have serious fun at the blow holes. 

Even though I had a sugar high, I knew I needed actual nutrients for a run, so I had a smoothie before I went. I think it was delicious, but I understand that it may not be for everybody.

Ingredients:

  • 1 1/2 cups milk (I used 1 c almond milk, and 1/2 c 2%, because I prefer almond milk but it doesn’t have as much protein as regular milk)
  • 1 cup frozen fruit (I like mixed berries, but I made it with peaches for a friend once and they loved it)
  • 1 cup loosely packed spinach (I pack it a bit, but go easy if you’re not a veggie fan)

Blend in a blender of your choice. I swear by my magic bullet. 

Image


I can’t taste the spinach in this, I swear. Nor can a couple of my sister’s friends who I made this for. My parents, however, could, and didn’t like it. I find this to be a delicious, refreshing smoothie, which I feel super awesome drinking because I know how good for my body it is. I have no problem getting my veggies in, because I love veggies, but if you’re not fond of them, disguise them in a fruity smoothie. It works, guys.

Anyway, here’s another jealousy inducing photo:

Image


-Happy Cooking!


Chocolate Éclairs

Pâte à chou. Say it with me, pah-ta-shoe. It’s the fancy French way of saying puff pastry, and until today, was my sworn enemy. It was the only thing which I could not get to come out right, no matter how many times I tried. For the past week or so, I’ve been crawling the net, looking for different recipes, and video tutorials, and finally felt that I could try again. My dad’s favourite dessert would finally be possible (I hoped…).

I used the éclair recipe from Joy Of Baking, which had a magnificently helpful video tutorial, but halved it, and these turned out pretty well! I was very pleased with myself 😛 The only thing is, I started these up before I was even fully awake this morning, and I grabbed the 1/3 cup instead of the 1/4 cup for the flour, so the dough was a little more paste-like than it should have been, but these worked out okay anyway. I had to cut tiny slits in the sides and leave them in the oven for another 10 minutes to dry them out a bit, but they still puffed up beautifully, and held up well with the cream.

Now, as you may have noticed if you’ve kept up with my posts and seen my pictures lately, I’m back home, on the sunny Caribbean island of Grenada, and that means that there are slight cooking limitations.  Like the fact that there hasn’t been any heavy cream or whipping cream on the island for a couple of months. While I was here over March Break, I volunteered in a French breakfast and lunch café, and the owner was having to call in favours from the grocery store managers to get some in so the restaurant could function (let me tell you how low-fat was not in the café’s vocabulary). Anyway, this made it quite hard to make traditional pastry cream, so I had to find a recipe which didn’t call for it. It wasn’t ideal, but it worked 🙂 I’ll include it, but I recommend the one from my Éclair Cake recipe (only half of it though), if you want the real deal. I like this one because it uses a whole egg, and not just yolks, and is a lot lighter feeling and tasting.

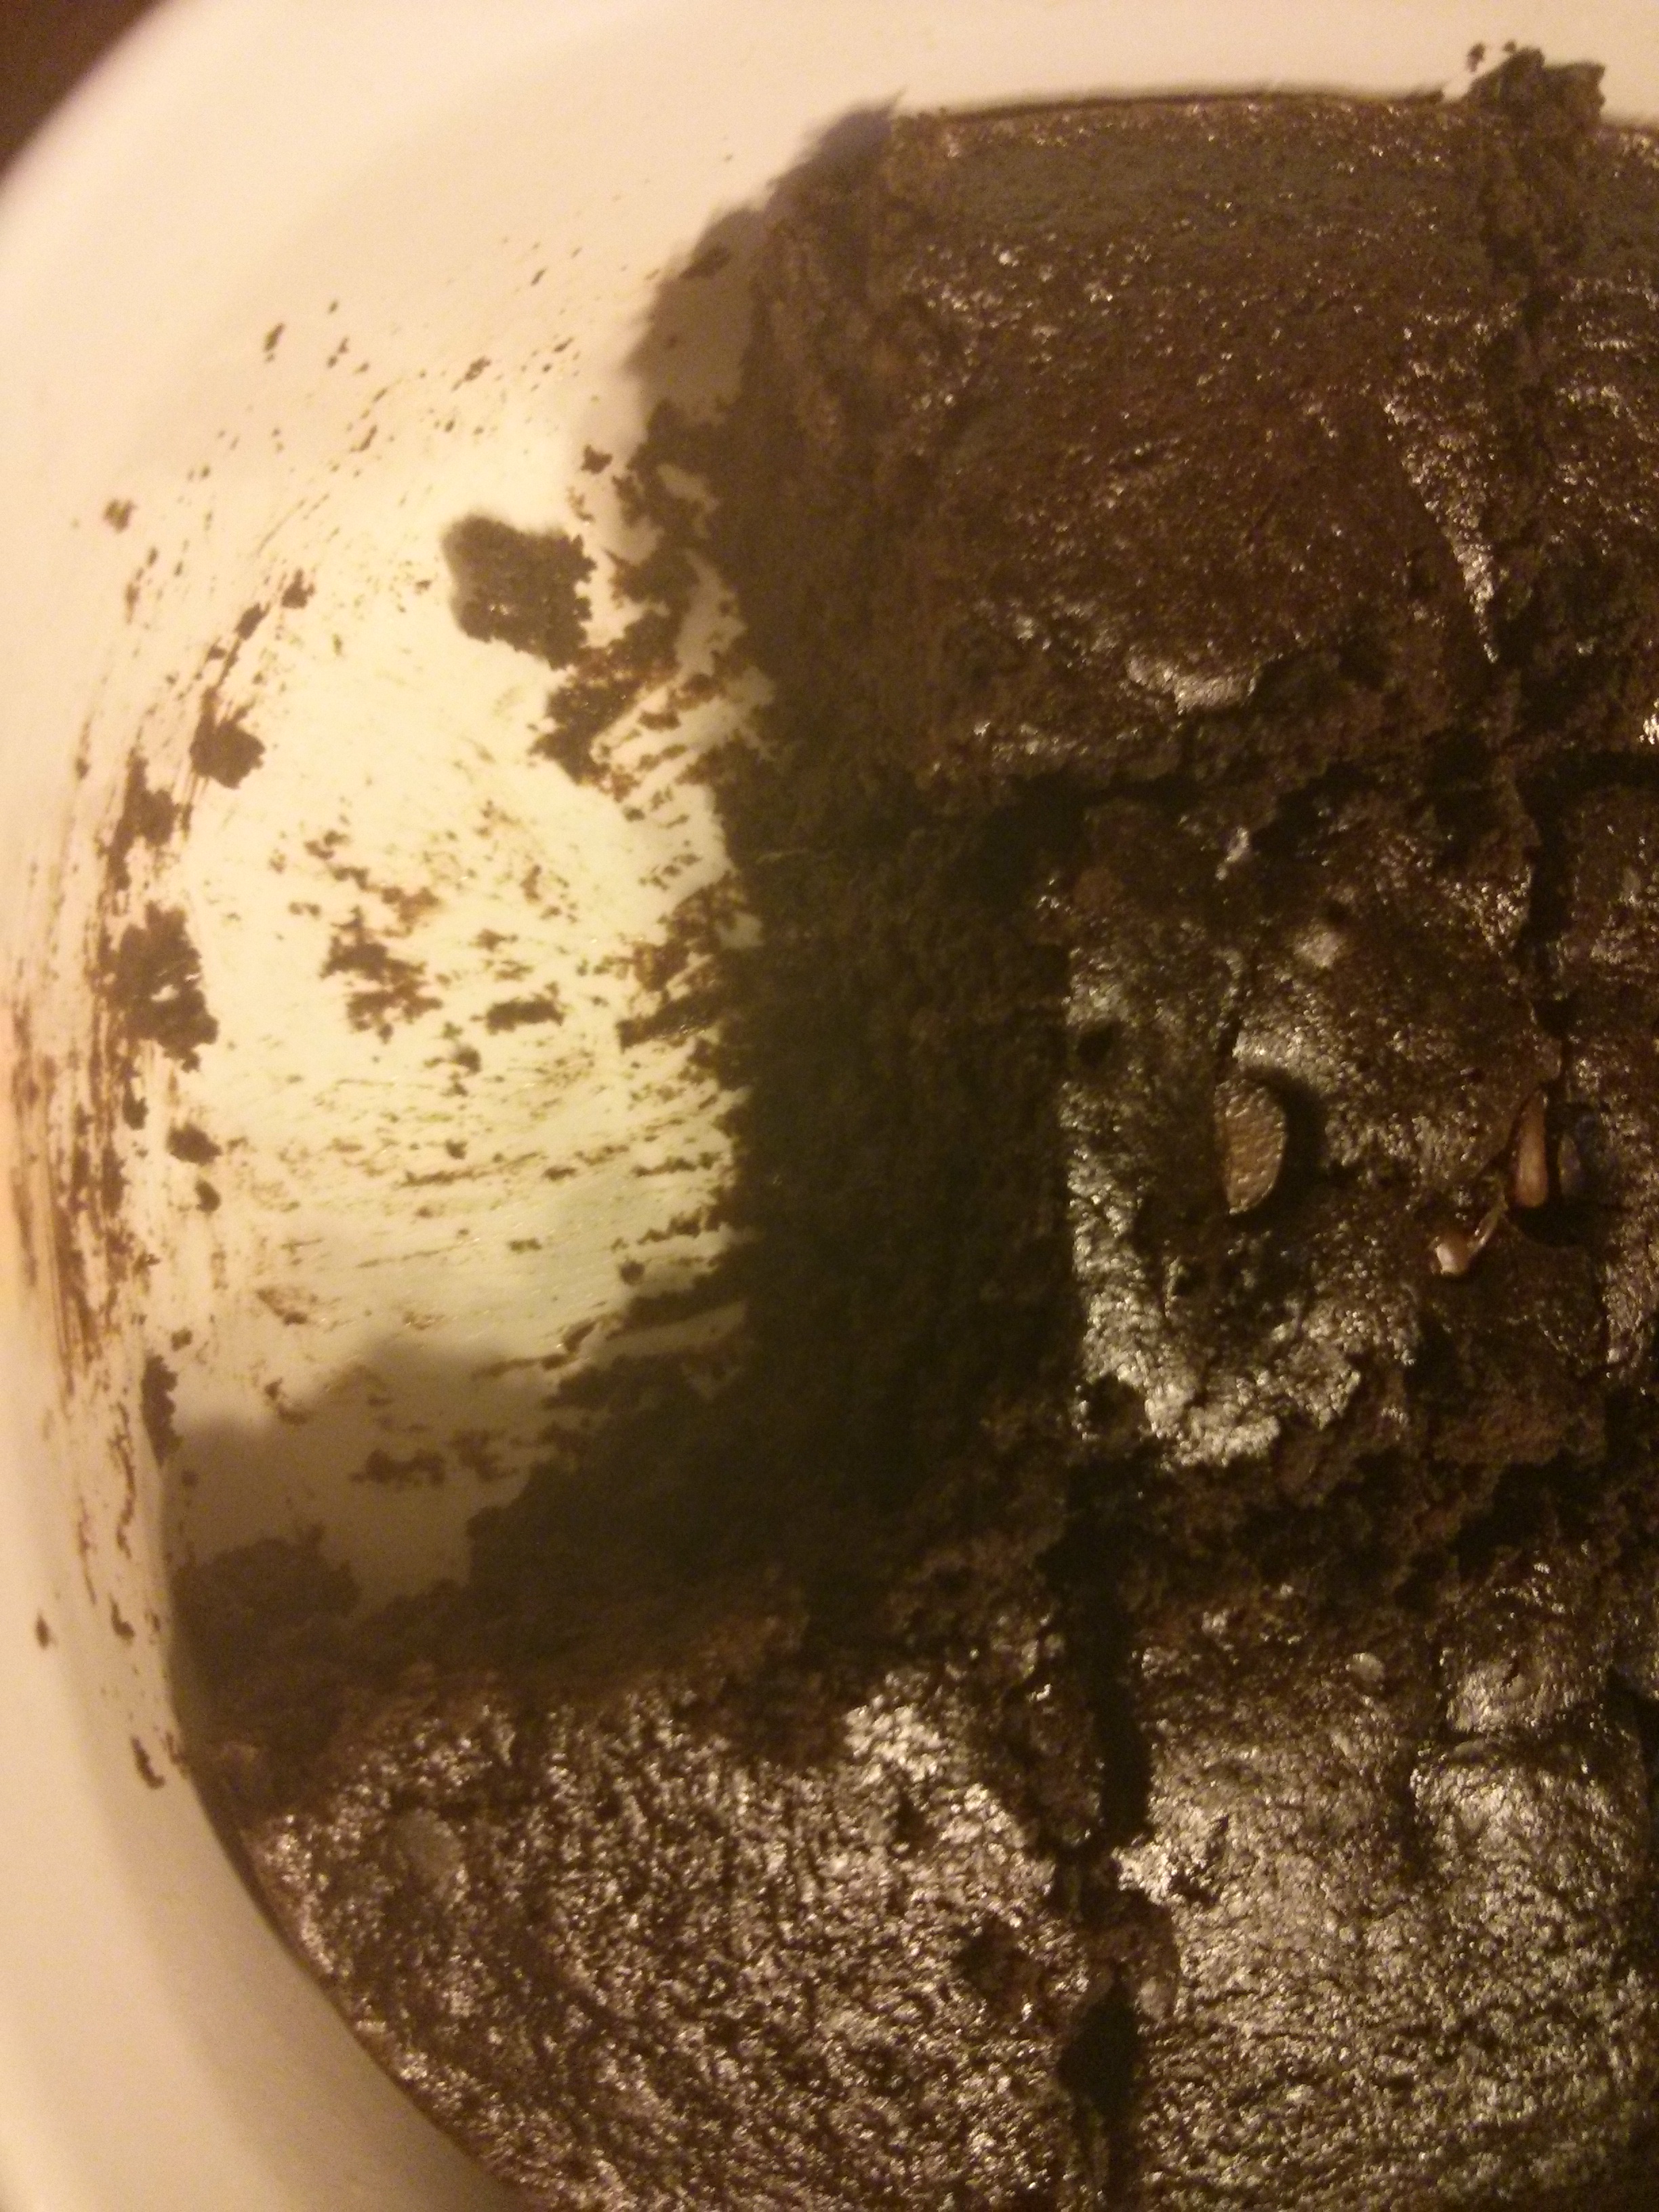
I also failed epically at the chocolate glaze because I only discovered after the fact that I didn’t have all the ingredients I needed for it, and tried to make something random with no success at all. None. It turned out to be a thin sticky mess, but it still tastes good! Use the glaze from the Éclair Cake recipe as well for this. It’s glossy and magnificent and super easy to do.

Essentially, this entire recipe is a big, fat, “Do as I say, not as I do!”

Enough of my ranting, let’s get to the recipe!

Ingredients:

Pâte à chou:

  • 1/4 cup all purpose flour
  • 1/4 tsp white sugar
  • small pinch of salt
  • 2 tbsp unsalted butter, cut up
  • 1/2 cup water
  • 1 large egg, lightly beaten

This makes 9 small 2″ puffs, or 6 normal 3″ puffs.

Lightened up pastry cream:

  • 2/3 cup milk
  • 2 teaspoons cornstarch
  • 1 large egg (I mean it when I say large, people)
  • 1 tablespoon and 1 teaspoon white sugar
  • 3/4 teaspoon vanilla extract

Again, go for the glaze from my Éclair Cake recipe.

To make the pastry, begin by preheating your oven to 400 F.

Whisk the flour, sugar and salt in a bowl, and set aside for a couple minutes, then put the butter and water in a small saucepan over medium-high heat, and bring it to a boil.

Once boiling, remove it from the heat and add the flour mixture all at once, and stir it together with a wooden spoon until combined. Place the saucepan back on the heat, an stir the mixture constantly until the dough comes away from the sides of the pan and forms a thick ball, which should take a minute or two.

Image


Move the dough ball to an electric mixer, or use an electric hand mixer, and beat on low speed to cool the dough down a bit, for about a minute. Once the dough is just warm to touch, start adding the beaten egg, a little at a time, and continue to mix until you’ve got a thick paste.

Image


If you have one, scoop the dough into a piping bag and pipe it in 2 inch lines onto a baking sheet lined with parchment paper, or a silicone baking mat, but if you don’t, you can use two spoons to do the job. Get a little more than a table spoon of the dough on one spoon, then push it off and onto the baking sheet with the other.

Not gonna lie, I found a really great trick for filling a piping bag on Martha Stewart’s website, which is to cover the tip with foil or cling film, prop it in a glass, and fold the sides down, then scoop whatever you’re piping in. It works really well.

Image

I was too lazy, but I highly recommend brushing the puffs with an egg wash to make them more golden.

Image


Bake them in the preheated oven for 15 minutes to form the shell, then reduce the heat to 350 F and bake for another 25 minutes, or until golden, to dry out the inside.

As aforementioned, I used a tiny bit too much flour and these didn’t dry out too well (which you can tell by inserting a wooden skewer to see if it comes out clean). If you have the same problem, cut small incisions in the sides with a sharp knife and put them back in the oven for five minute intervals until they dry out. No more than 10 minutes though. After that, remove them from the oven and place them on a wire rack to cool.

Image

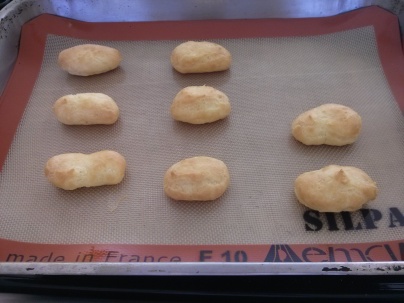
Let’s not judge me for the missing éclair. I had to test if they were okay because of the extra flour 😛

To make the pastry cream, whisk together the milk with the cornstarch in a small saucepan. Cook over medium heat until very hot and steaming, but not quite simmering. Whisk your egg together with your sugar in a bowl until well beaten. Slowly whisk in half of the hot milk mixture, adding it about 2 tablespoons at a time until incorporated. Stir the egg mixture into the saucepan of milk, and cook gently until thickens and begins to bubble. Remove from heat and stir in vanilla extract. Set it aside to cool. *Watch this carefully guys! You don’t want scrambled egg bits in your pastry cream, so stir it constantly.*

Once your cream is well chilled (I threw mine in the freezer for a bit, covered with plastic wrap pressed against the top), scoop it into a piping bag and, using the smallest tip, pipe it into your éclairs. If you don’t have a pastry bag, cut the éclairs in half with a very sharp knife and spoon it on, then sandwich them.

To finish, dip your éclairs in your chocolate glaze of choice, then enjoy! You can eat them right away, or keep them in the fridge for a couple of days, or do what my dad (very weirdly) likes to do, which is freeze them. They pretty much turn into fancier, more of a pain in the butt, ice cream sandwiches. To each their own, I guess.

Seriously, please ignore my horrible glaze job, and just trust that I can actually make a decent one, just not this time. I’ll update y’all when I make these better next time!

Image


Even with all my epic fails today, these turned out pretty great. Mistakes in the kitchen aren’t the end of the world 🙂

-Happy cooking!

Mexican Lasagna Rolls

It’s my mum’s birthday today–how cute is it that my ‘rents’ birthdays are only 11 days apart?!–so I wanted to do something nice for dinner. I racked my brains all of last night, and scoured the internet, until I settled on lasagna rolls, which I had been wanting to try for a while. The only problem was, the only ingredients I really had for a traditional lasagna were the noodles, so I had to figure out something different. I searched the internet for ricotta-less recipes, and mozzarella-less ones, or marinara sauce-less ones, to be honest, and I really couldn’t find any which I had all the ingredients for, and I didn’t want to ask either of my parents to go to the grocery (let’s not forget I’m not even 17 and don’t have or want a drivers licence yet), so I kind of came up with my own. The only thing I really took from other recipes were the amount of time to cook the rolls, and what temperature, so I’m proud to say this is my first completely original recipe. Yay for Riley! (Joking, I was hoping so hard these would turn out well and my mum wouldn’t end up eating a grilled cheese sandwich for supper on her birthday.)

You’ll notice in the pictures that I started out making just half of the recipe, and used a round pan. I later learned of more mouths turning up tonight, and doubled it, getting the recipe below.

Ingredients:

  • 10 lasagna noodles
  • 2 chicken breasts
  • salt and pepper to taste
  • 4 tsp olive oil
  • 1 1/2 cups 0% Greek Yoghurt, divided
  • 1 1/2 cups medium or hot chunky salsa, divided
  • 1 tsp cumin
  • 1 tsp chilli powder
  • 3 cups grated cheddar cheese, divided
  • 1 cup grated parmesan

Some lasagna recipes say to use dry noodles (obviously not this one, because they need to be rolled), and some say to boil them to almost cooked, but I like to take the long route and soak mine. I’m a pain in the butt like that. Place your noodles in a large baking dish and cover them with cool (not ice cold, c’mon people) water.

.Image

Leave them for about 1 hour until soft and pliable. I find this gives them a nicer texture, but you can boil them if you can’t get to your kitchen within 1 hour of your meal. I will warn you, though, that this is not a quick meal. I don’t like quick meals. I have a lot of time on my hands and cooking is therapeutic to me, so I like to draw it out. If you want to do these quickly sometime, make them a day ahead and place them in the fridge, covered in cling-film, and then pull them out when it’s time to cook ‘em.

While your pasta is soaking, you should cook your chicken. It’s gonna need to be shredded for this recipe, so you’ll need a little bit more time. Cut your chicken breasts into strips, and season with salt and pepper, then cook them in a pan with olive oil in it, on medium-high, for about 3 minutes per side, or until cooked through. You be the judge of the doneness of your poultry. When they’re finished, you can shred them with two forks, or you can do like me and wait for them cool for a couple minutes and then just pull them apart with your fingers. Set your shredded chicken aside until it’s needed.

Image

For this lasagna sauce, I went more Mexican than Italian, because I had more Mexican ingredients on hand. As I said, it wasn’t exactly last minute, but I don’t have a driving licence, and I didn’t want to ask my mum to take me to the grocery on her already busy birthday, so Mexican it was.

Now may be a good time to preheat your oven to 450 F.

Mix a cup of Greek yoghurt (or you could use sour cream, I suppose), and 1 cup of salsa in a medium bowl, then mix in your chilli powder and your cumin. I used hot salsa, and it wasn’t too spicy because the Greek yoghurt balanced it out nicely, but if you use medium, you might want to add maybe a 1/4 teaspoon more chilli powder and cumin, just to give the dish more umph. Or not. Whatever you feel comfortable with 🙂

Add your shredded chicken and 2 cups of cheddar cheese to the mixture, and stir to combine.

Lay your softened lasagna on paper towels, or a dish towel, and pat them dry, then get ready to rock n’ roll (I’m sorry, that was cheesy… no pun intended… I’ll be quiet now).

Mix your remaining Greek yoghurt and salsa, and make a bed for your roll ups in a casserole dish.

Spoon out your filling evenly onto the noodles, then carefully roll them up, avoiding spillage, and place them in the saucy bed, seam down. Sprinkle them with the remaining cup of cheddar cheese, parmesan, and a little bit of black pepper.

ImageImage

If you’re doing these ahead of time, cover them with cling film and place them in the fridge, for no more than a day. If you’re doing them right away, tent with foil, then bake in the preheated oven for about 20 minutes, then remove the foil and cook for about 15 minutes, or just until the cheese on top browns. Remove the pan from the oven, and let the lasagna rest for about 5 minutes, then serve! A salad on the side would be great, and maybe some good bread, with garlic butter.

I 1000% forgot to take a picture of this when all ten came out of the oven (sorry!), but they looked great, and my family loved them! Very easy to half the recipe (as you can see) if you’re only making for a couple of people.

-Happy Cooking!

PB & J Breakfast Smoothie

This is a simple vegan breakfast smoothie, fully of nutty flavour and deliciousness, to give your day a kick-start.

Ingredients:

  • 1 cup of vanilla (or plain) almond milk
  • 3/4 cup frozen raspberries
  • 2 tbsp peanut butter
  • honey, to taste

You can customize it to your own favourite peanut butter and jelly needs, but my favourite is slathered with raspberry jam… and peanut butter too because you can never get enough peanut butter. Ever. You could easily do frozen strawberries or blueberries, or freeze some grapes and stick them in there! You are the boss of your PB & J smoothie.

I have a magic bullet, so I blended in there, but if not, throw all your ingredients into a blender, and blend until smooth. Sooooo good, guys.

Image

-Happy Cooking!


Garlic Parmesan Dinner Rolls (For Two)

Wooo. I’m making pasta again for supper tonight (nothing special, just store-bought pesto sauce with some chicken breast), so I thought it was time again to make these rolls, which I’d made for a big family dinner quite a while ago. I have a strange obsession with tiny servings of recipes, though (mainly because I never cook for more than two or three people), so I figured I’d scale this down, and make only two for Papa and Dad tonight.

Image

This is how gorgeous they were when I made the full batch of eight the first time!

Ingredients:

  • rounded 1/2 tsp active dry yeast *
  • 2 tbsp all purpose flour
  • 1/8 tsp white sugar
  • 1/4 cup warm water (100-110 F)
  • 1/4 tsp salt
  • 3/4 tsp olive oil
  • 1/4 egg **
  • 1/4 cup and 3 tbsp all purpose flour
  • 1 tsp melted butter or margarine
  • 1 clove garlic, finely minced
  • 3 tbsp freshly grated parmesan cheese, or more to taste, divided
  • 2 tsp freshly chopped parsley
  • olive oil for brushing (or a little extra melted butter or margarine)

*Yeast comes in packages of 0.25 oz, or 2 1/4 tsp. For this recipe you need a 1/4 of a package, which is just barely over 1/2 a tsp. Go for a rounded teaspoon, but because yeast runs away, you’ll get the amount you need 🙂

**A single egg has about 4 tablespoons worth of egg in there, once well beaten, so beat it, then scoop a tablespoon. Sometimes I find egg hard to scoop, so it’s easiest to beat it in a liquid measuring cup with an easy pour spout, and pour it into the tablespoon.

Whenever I describe these to people, I call them cinnamon rolls which have grown up, and become cheese filled, and savoury 😛

First, you need to make a sponge, which is kind of giving the yeast a little head start at rising. Mix the yeast, sugar, 2 tablespoons of flour, and warm water in a bowl, and cover. Let is rest for 15 to 20 minutes, until it becomes bubbly and foamy.

Image


After that, you’re going to stir in the salt, olive oil,  and the quarter of beaten egg. Stir, stir, stir. Next, you’re going to add the rest of your flour. This dough is super sticky, so don’t be tempted to add more, unless it really, really needs it. It should be able to just pull away from the sides of your bowl.

Image


When you’ve completed that, cover with a damp towel, and let it rise in a warm place until it doubles in size, which should take about an hour, to an hour and a half.

Image

Once finished rising, scrape the dough onto a generously floured surface, and then generously flour the top of it. This is a no knead dough, so pat it gently into a small rectangle, then use a floured rolling pin to roll it into a 6×3 inch rectangle, about a half inch thick. Mine was about 6×4, but 6×3 is ideal.

Image

Take your finger, and flatten about an inch on one of the shorter sides, then go to town with your filling, avoiding the flattened bit. I brushed a generous amount of melted butter inside, then evenly sprinkled the minced garlic, chopped parsley, and about 2 tbsp of fresh parmesan cheese.

Image


Now, sprinkle some water on the flat bit, to ensure sticking, then, going from the other short end, roll your dough into a teeny log, and cut it in half.

Image

Look at how cute it is. Look!

Then place them on your baking sheet (I used a square cake pan, instead of a massive sheet), cut side up, and cut an X on top so that your filling will be more exposed. Brush with olive oil, or extra melted butter or margarine, and then  sprinkle with a little more parmesan cheese. Cover and allow to rise for another 20 to 30 minutes.

Image

They have a bit of a tendency to tip over when they’re rising, but it’s no biggie.
Image


Preheat your oven to 400 F. Bake the rolls for about 20 minutes, until the tops turn golden brown. Freshly grated parmesan is ideal, but I only had slivered, so they didn’t turn out exactly as pretty as the first time, but they were enjoyed just as much!

Image


-Happy Cooking!